Installing Ubuntu 12.04 on Lenovo
Thinkpad W530
David Booth <david@dbooth.org>
29-Jan-2013
I never finished writing this up. Portions marked @@@@ are
placeholders, most often for screenshots that I intended to add but got
accidentally deleted.
This W530 came with Windows 7 pre-installed, so I am intending to leave
Windows 7 installed, and set up Ubuntu in a dual boot
configuration.
The laptop is new and I did not bother to go through the Windows 7
initial configuration process.
Hardware
Initial hardware was Lenovo Thinkpad W530, purchased
from
B&H with:
- 2.6GHz Intel Core i7-3720QM Quad-Core
- 8GB of 1600MHz DDR3 RAM
- nVIDIA Quadro K1000M Graphics (2GB)
- 500GB 7200rpm Hard Drive
- 15.6" Full HD Anti-Glare LED-Backlit Display
- 1920 x 1080 Native Resolution
- SuperMulti DVD Burner
- 802.11a/b/g/n Wi-Fi, Bluetooth 4.0
- Windows 7 Professional (64-bit)
Separately purchased, and added later:
- 2x8GB = 16 GB RAM (for a total of 24GB, because the W530 has 4
slots)
- 512GB SSD, Crucial M4
Ubuntu 12.04 Installation
1. Download and burn a Ubuntu 12.04LTS CD.
2. Plug in ethernet cable to W530, for network access without
wireless.
3. Insert the Ubuntu CD, then power up and boot into Ubuntu from
it. I had to use the paper
clip
trick to open the drive when the power was off, in order to
insert the CD.
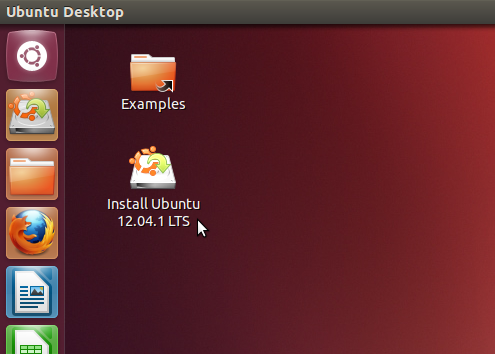
4. Run "Install Ubuntu 12.04 LTS" from the Ubuntu desktop:
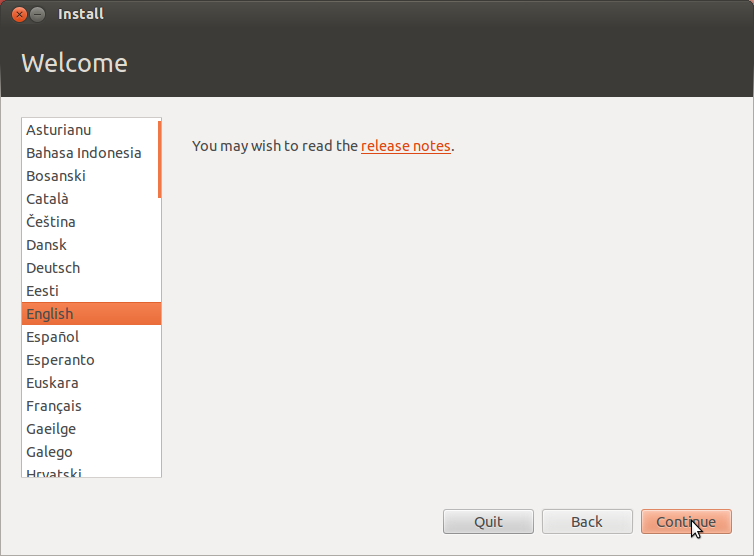
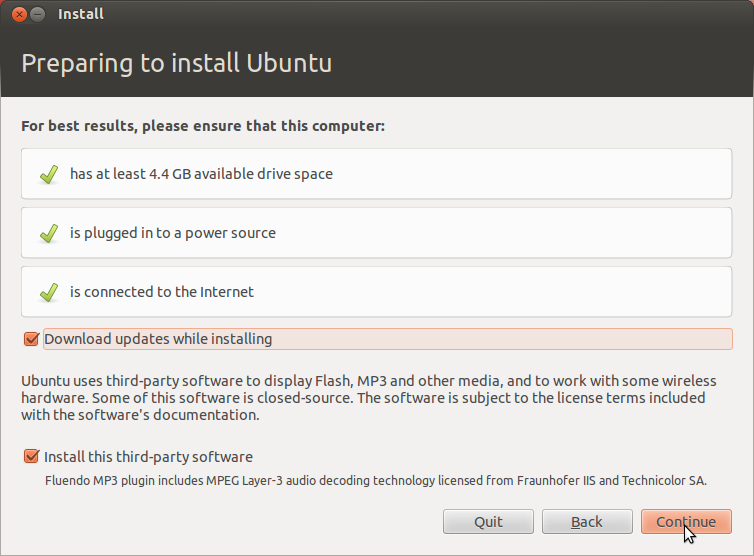
5. Select your language (English), and on the "Preparing to install
Ubuntu" screen, select both "Download updates while installing" and
"Install this third-party software".
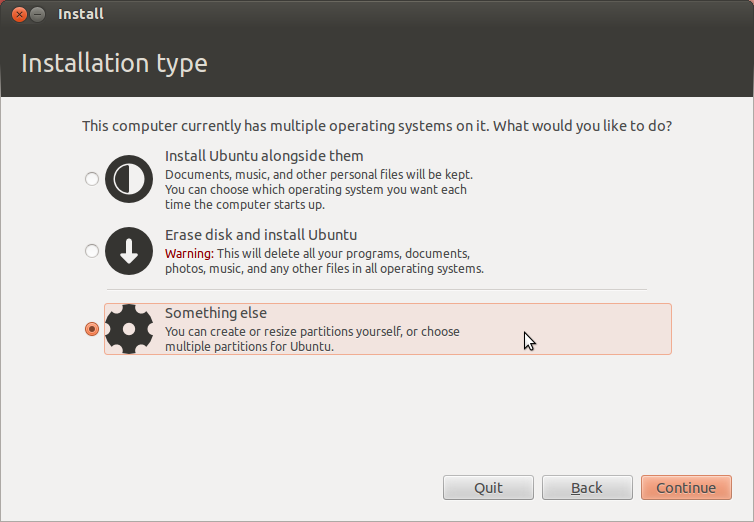
6. At the first "Installation type" screen, select "Something else" and
Continue. The screenshot below shows three options because I
re-ran this in order to get the screen shot, but first time you run it
there will only be two options:
7. This should bring you to another "Installation type" screen that
lists the existing disk partitions. Problem: There are three partitions
shown and the largest is listed with "unknown" space used:
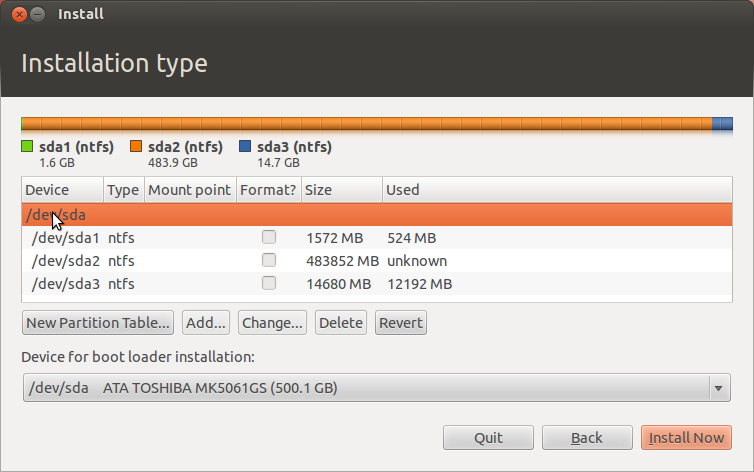
The "unknown" is what bothers me. This is the partition that I
need to resize, in order to make space for Ubuntu, but I cannot resize
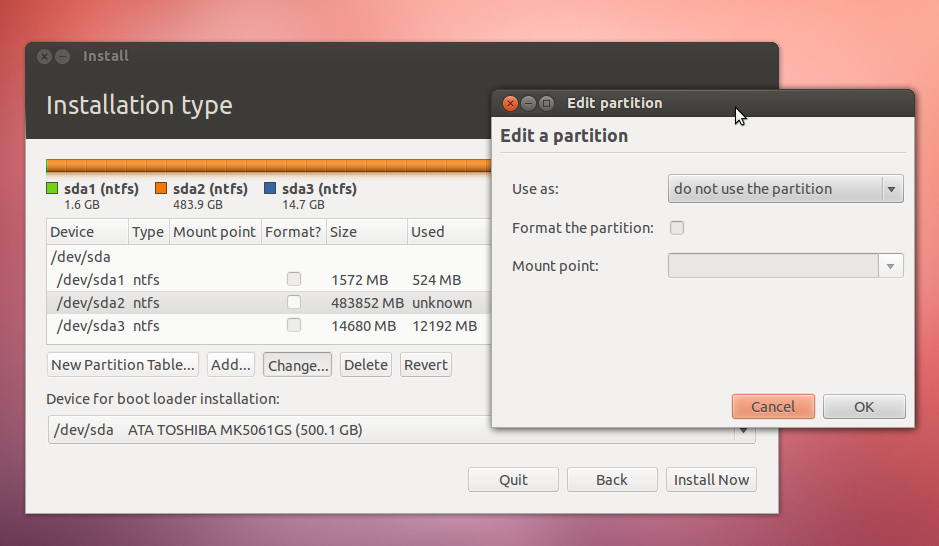
that partition if the space used is "unknown". When I select that
partition and click "Change", there is no option to change the
partition size:
In contrast, when I select the /dev/sda3 partition, I see an option to
resize it (which I do NOT want to do -- that's the wrong partition to
resize). I am only showing you this screen shot so that you can
see what the other one should have looked like:
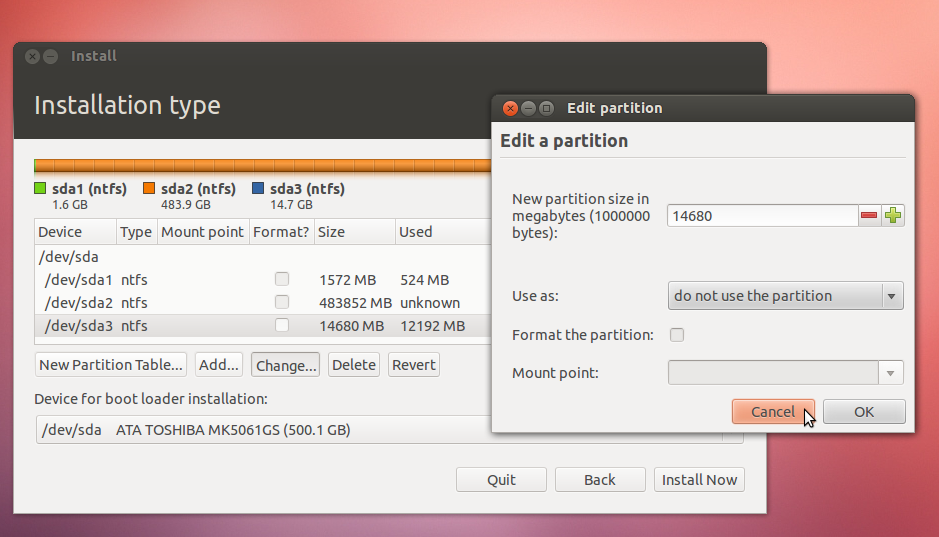
To reiterate, do NOT resize the /dev/sda3 partition. Click
"Cancel" to dismiss the "Edit partition" dialog.
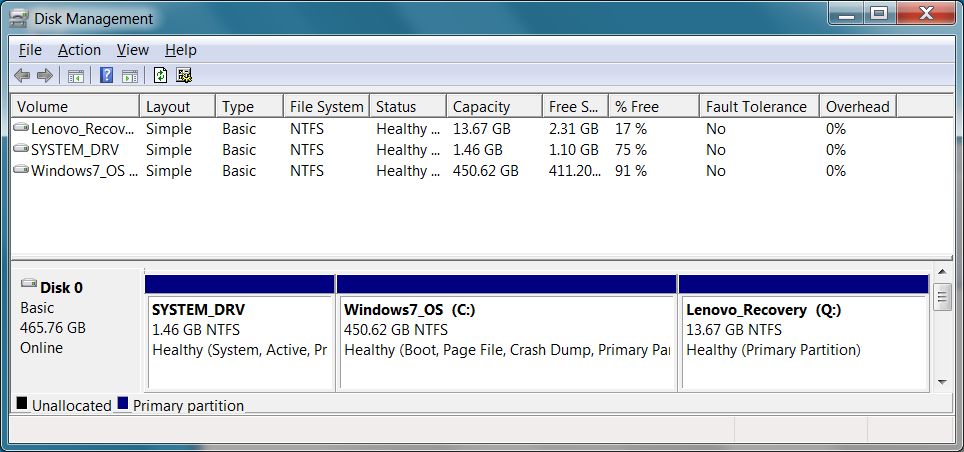
I am not sure what the existing partitions are, but by opening a
terminal window (Ctrl-Alt-T), and using the command "df -m" I can see the
partition assignments and the space used (in MB) in the last three
entries:
ubuntu@ubuntu:~$
df
-m
Filesystem 1M-blocks Used Available Use%
Mounted on
/cow
3821
57
3764
2% /
udev
3813
1
3813
1% /dev
tmpfs
1529
1
1528
1% /run
/dev/sr0
696
696
0
100% /cdrom
/dev/loop0
667 667 0
100% /rofs
tmpfs
3821
1
3821
1% /tmp
none
5
1
5
1%
/run/lock
none
3821
1
3821
1% /run/shm
/dev/sda1
1500 366 1135 25%
/media/SYSTEM_DRV
/dev/sda2 461438
39672 421767 9% /media/Windows7_OS
/dev/sda3 14000
11628 2373 84%
/media/Lenovo_Recovery
ubuntu@ubuntu:~$
After searching a long time, I found a reply to this
forum
post that says:
"If the installer is not reporting
usage value for an ntfs partition, it is better to resize it from
Windows. Viewing it from Windows will give you a better idea of how
much free space is left on it.
Use Windows’ partition manager (type “partitions” into the search box
to find it)."
So I guess that's what I'll try. :(
8. Shut down Ubuntu by clicking the gear icon in the upper right and
selecting "Shut Down...":
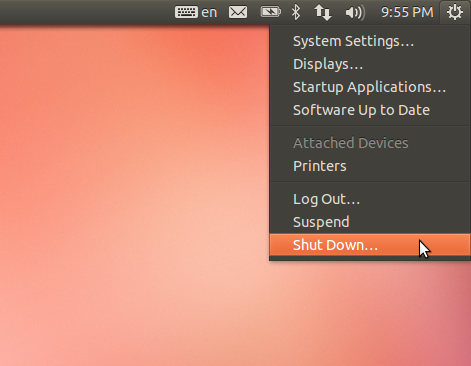
If the CD does not eject automatically, then use the paper clip trick
again to eject it.
9. Boot up to Windows 7 and run through the Windows 7 configuration
process that it goes through the first time you boot it. This may
take several reboots as Windows does whatever it does for updating
itself.
10. Run the Windows 7 Disk Management utility. To do so, click
the Windows 7 icon in the lower left of the screen, and type
"partitions" in the search box
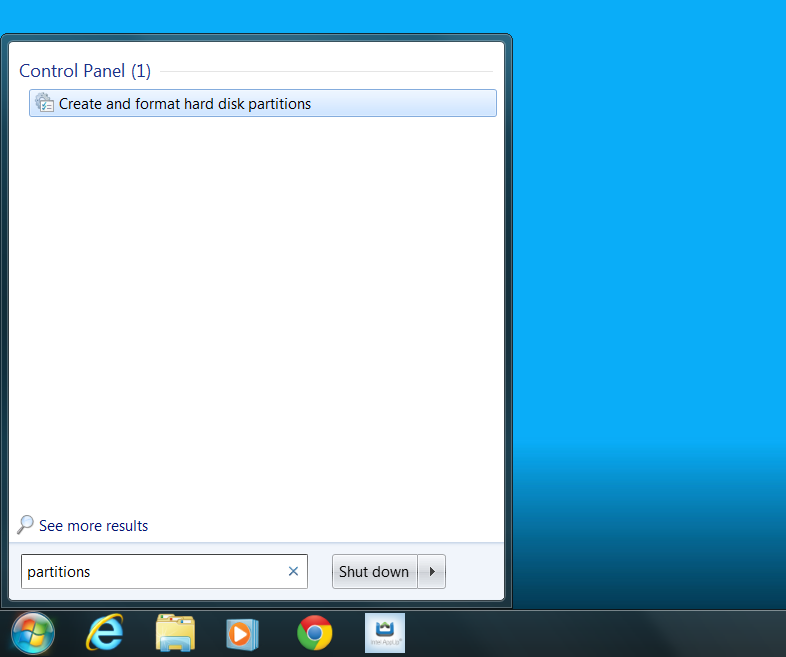
Then click "Create and format hard disk partitions" in the menu, to run
Disk Management:
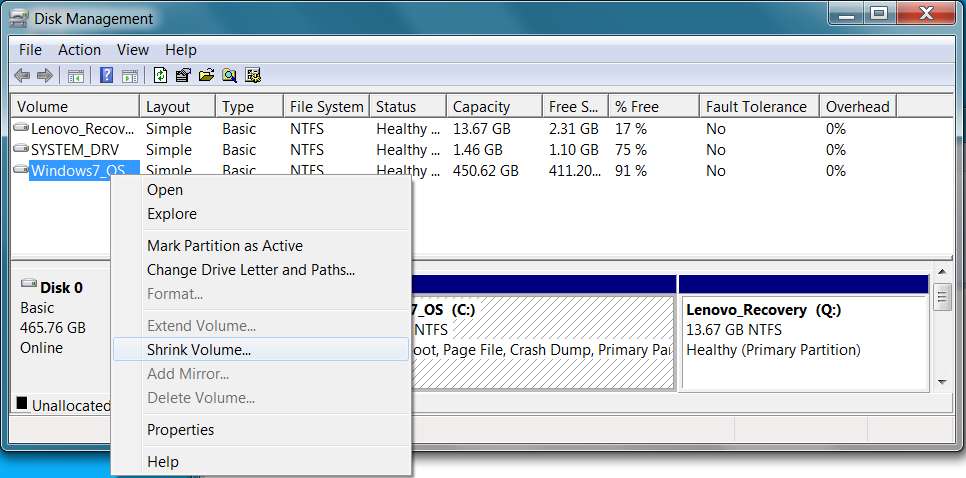
11. Select the Windows7_OS partition/volume, right-click and select
"Shrink":
It will bring up a dialog telling you that it is asking the drive about
the available space, and when that finishes it will bring up a dialog
that you can use to shrink this partition:

Problem: It says that this
partition can only be shrunk down to about 200GB! Since most of
my work will be under Ubuntu, I would be wasting nearly half of my
drive capacity if I only shrunk the partition that much. I found this
article that says "On partitions that store Windows operating
systems, there may be certain files on the disk that can prevent you
from shrinking a volume." This appears to be the case. This
other
article gives long, complicated instructions for getting
around the problem on Vista -- I don't even know if the same procedure
would work on Windows 7. But at this point I decided that it
isn't worth the trouble. I'm going to bail out and wipe out that
entire partition and just run Ubuntu using that whole partition.
In theory, I should be able to restore Windows 7 from the
Lenovo_Recovery partition someday if I want to, but I have not tested
that theory. To be safe, I think I will try installing the SSD
and installing Ubuntu on that, temporarily leaving the Windows 7
partition in place. That sounds like a safer route. After I
get Ubuntu running from the SSD, I can remove the Windows 7 partition
entirely if I want.
Installing SSD
12. Make a Windows7 Recovery DVD. I followed instructions in the Thinkpad
W530
User
Manual to do this. I selected only the option for a
Boot disk -- not for a data disk. I assume that this operation
copied files from the Lenovo_Recovery partition, but I really don't
know.
13. Remove the existing hard drive, and replace it with the SSD.
Again, I followed instructions in the Thinkpad
W530
User
Manual to do this. However, I noticed that the
original hard drive had a plastic tab attached, which allows the drive
to be pulled out:
@@@@
The SSD drive did not have one, and I was concerned that it may be
difficult to get it back out again, given how it is friction-fit, and
it provided nothing to grab. Therefore, I added my own plastic
tab made of packing tape:
@@@@
The loose end of the packing tape is doubled back on itself, so that no
sticky surfaces are exposed.
I decided, for the moment, to leave the old hard drive out entirely, to
be certain that I did not accidentally install Ubuntu on it or
otherwise create any dependency on it when installing Ubuntu.
Installing Ubuntu 12.04 on the SSD
14. With the SSD installed, repeat steps 2-5 above, to boot from the
Ubuntu CD, select language (English), click "Install Ubuntu" and
specify that you want to download updates while installing, and to
install third-party software.
15. Select "Erase disk and install Ubuntu", and Continue. Since
the original hard drive has been removed, I know this can only install
on the new SSD, which is what I want.
@@@@
16. Click "Install Now":
@@@@
17. Select timezone and Continue:
@@@@
18. Select keyboard layout:
@@@@
19. Specify computer name, login name, password:
@@@@
20. Take your photo:
@@@@
21. Wait while it installs:
@@@@
Success!
22. Click "Restart Now", remove the installation CD (as the screen
says), and hit the Enter key to let it reboot from the SSD
installation. After it reboots, you should get your Ubuntu login
screen:
@@@@
23. (Optional) Install Gnome Desktop. I find the default desktop
environment (Unity) that comes with 12.04 to be dumbed down to the
point of being incredibly frustrating, much like MS Windows.
(E.g., where the hell is a button or menu to open a command
window???) Therefore, I would rather revert to the Gnome Desktop
environment that was standard in Ubuntu 10.04. To get this, I
followed these
instructions. FIrst, use Ctrl-Alt-T to open a command window
(since there is no button to do so), and issue the command "sudo
apt-get install gnome-panel":
@@@@
Also: apt-get install gnome-desktop-item-edit
24. Logout, then at the new login prompt, click the round button next
to your name:
then select "GNOME Classic (no effects)" or "GNOME Classic" before you
login:
@@@@
25. Install updates. Run the Update Manager:
Applications->System Tools->Update Manager.
@@@@
26. Verify that some key features work:
- Wireless - yes
- USB drive - yes
- Backlit keyboard - yes (Ctrl-Space cycles through 4 settings:
off, low, high, off-but-webcam-light-on)
- Add network printer - NO. I guess I'll try to fix that next.
- Webcam - yes
- Second display - NO.
Will try instructions at
http://askubuntu.com/questions/180984/external-display-is-not-working-under-ubuntu-with-a-thinkpad-w530
27. Verify that network printing does not work. Run
Applications->System Tools->System Settings
@@@@
Click "Printers"
@@@@
Click Add New Printer
@@@@
Select "Network", and notice the error message saying "FirewallD is not
running. Network printer detection needs services mdns, ipp,
ipp-client and samba-client enabled on firewall."
@@@@
28. Fix network printing. Following instructions in this
blog
post, open a terminal window (Ctrl-Alt-T) and run "sudo
system-config-printer":
@@@@
This pops up a window for adding a printer:
@@@@
Click "Add", and "Network Printer". If your desired printer
shows up in the list, you're in luck. In my case it didn't:
@@@@
So I need to manually enter some information to locate it. In my
case, the printer I wish to use is on another Linux/Ubuntu computer on
the same network. I don't know that computer's IP address, so I
went over to it, opened the list of printers (via
System->Administration->Printing, because that computer is
running Ubuntu 10.04), right-clicked on the printer and selected
"Properties", which allowed me to see that it was using the ipp
protocol and also see its IP address.
Back on my new ThinkPad W530, click "Find Network Printer", type in the
network printer's IP address where it asks for "Host" (note that it did
not work for me when I tried entering the host name -- I had to use the
IP address)
@@@@
then click Find, select the desired printer connection at the bottom,
and click Forward:
@@@@
Enter a desired short name for the printer, and Apply:
Then print a test page. Problem:
the test page printed only the text commands instead of the
result of the PDF commands:
@@@@
To make sure the printer was working correctly, I printed a test page
from a different networked computer, and it printed the familiar Ubuntu
test page:
@@@@
29. Install Foomatic printer driver software. Comparing the
printer configurations on the W530 with an older Ubuntu laptop, it
looks like the W530 is not using the same printer driver, which it
apparently calls "Remote Printer". (To see this: In a command
window, run "sudo system-config-printer", then right-click on the
printer, and select Properties.) Run Applications->Ubuntu
Software Center:
@@@@
Search for "foomatic" in the upper right corner, select @@ [Did not
finish getting this fixed] @@
40. Get the external monitor working (second display). I followed instructions from a blog post by Chris Pearce:
In the terminal enter:
sudo add-apt-repository ppa:ubuntu-x-swat/x-updates
sudo apt-get update
sudo apt-get install nvidia-current
Then reboot to change BIOS settings:
At the Lenovo BIOS screen press
"Enter" to interrupt normal startup, F1 to enter BIOS setup utility.
Change Config > Display > Graphics DeviceDiscrete Graphics.
This means the hardware will attempt to use only the Nvidia graphics
card, not the Intel integrated graphics. Press F10 to save and boot the
computer.
After that, the second display worked!
Problem discovered later:
Brightness controls no longer work, so I cannot save battery while
flying by turning down the brightness. Also, I cannot change the
screen resolution.
Manuel sugggests instead installing nvidia-current-updates
sudo dpkg -l | grep nvidia
sudo apt-get remove nvidia-experimental-310
sudo apt-get remove nvidia-settings-experimental-310
sudo apt-get remove nvidia-settings-updates:i386
sudo apt-get install nvidia-current-updates
sudo apt-get install nvidia-settings-updates
Manuel suggests removing everything nouveau-related, because they are
the open source nvidia drivers, and not mature enough, and instead use the drivers from NVidia. This also mentions problems with nouveau. But when I try to remove the nouveau drivers, I get dependency problems:
# dpkg -l |grep nouveau
ii  libdrm-nouveau1a                             2.4.39-0ubuntu1                                  Userspace interface to nouveau-specific kernel DRM services -- runtime
ii  libdrm-nouveau2                              2.4.39-0ubuntu1                                  Userspace interface to nouveau-specific kernel DRM services -- runtime
ii  libdrm-nouveau2:i386                         2.4.39-0ubuntu1                                  Userspace interface to nouveau-specific kernel DRM services -- runtime
ii  xserver-xorg-video-nouveau-lts-quantal       1:1.0.2-0ubuntu3~precise2                        X.Org X server -- Nouveau display driver
The correct one to remove seems to be libdrm-nouveau2, since if I try to remove all of them at once, I get dependency problems:
# apt-get remove -m libdrm-nouveau2
Previously I had tried to remove all at once, but it failed:
apt-get remove libdrm-nouveau1a libdrm-nouveau2 xserver-xorg-video-nouveau-lts-quantal
The following packages have unmet dependencies:
 libaudio2:i386 : Depends: libxt6:i386 but it is not going to be installed
 libmaven2-core-java : Depends: libdoxia-java (>= 1.1) but it is not going to be installed
 libqtgui4:i386 : Depends: libsm6:i386 but it is not going to be installed
 openssh-client : Depends: adduser (>= 3.10) but it is not going to be installed
                  Depends: passwd
 ssh : Depends: openssh-server
E: Error, pkgProblemResolver::Resolve generated breaks, this may be caused by held packages.
Now install the NVidia drivers:
apt-get update
apt-get upgrade
sudo  apt-get install --reinstall nvidia-current-updates
Now
the settings can be seen at: Applications->System
Tools->Administration->NVIDIA X Server Settings, but I did not
change any of them. If that doesn't work, they can also be seen
with the "nvidia-settings" command. However, when I run
nvidia-settings, I get this warning telling me to run nvidia-xconfig:
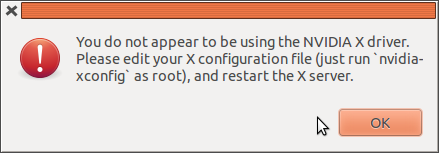
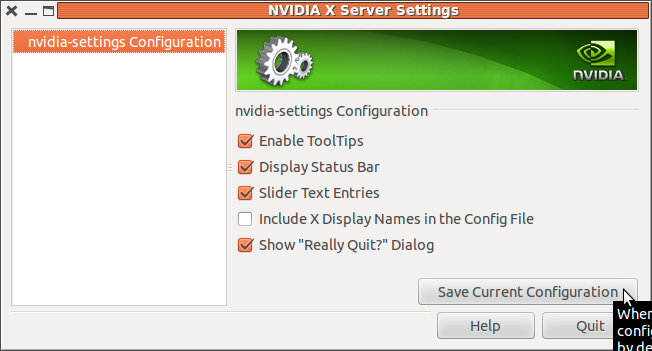
But there is no nvidia-xconfig program installed. So instead, I
tried clicking "Save Current Configuration", without making any changes:
After rebooting, when I run Applications->System
Tools->Administration->NVIDIA X Server Settings, I no longer get that error dialog. So I also tried:
sudo nvidia-xconfig

Using X configuration file: "/etc/X11/xorg.conf".

VALIDATION ERROR: Data incomplete in file /etc/X11/xorg.conf.
                  Device section "Default Device" must have a Driver line.

Backed up file '/etc/X11/xorg.conf' as
'/etc/X11/xorg.conf.nvidia-xconfig-original'
Backed up file '/etc/X11/xorg.conf' as '/etc/X11/xorg.conf.backup'
New X configuration file written to '/etc/X11/xorg.conf'
Problem: With the BIOS set to the
Display->Discrete Graphics setting, I am unable to change the screen
resolution or brightness.
I then changed the BIOS setting back to NVIDIA Optimal, and the
brightness control now works and I can change display resolution. Problem: The external display does not work.
I also tried changing the BIOS Display setting to Integrated Graphics,
but the external display still did not work. Thus far, the only
way I have been able to get the external display
working is to change the BIOS Display setting to Discrete
Graphics. :( Therefore, my plan is to use Discrete
Graphics
normally, and change to NVIDIA Optimal when I wish to save battery life
(such as flying).
Problem: In BIOS->Display->Integrated Graphics mode, the display is only 640x480.
My colleague Manuel recommends this:
(05:56:46 PM) david: any ideas what woudl happen if i re-installed nouveau?
(05:57:31 PM) manuel: no. i would recommend this:
(05:58:20 PM) manuel: log out of X, then go to a console, delete the xorg.conf file (should be in /etc/X11/), and run nvidia-settings as root
(05:58:44 PM) manuel: could also be nvidia-xconfig (i don't remember which one of the is the command line tool)
(05:58:58 PM) manuel: it'll generate a clean config file for the nvidia driver
50. Install Oracle Java7. Follow these instructions to "Install Oracle Java 7 in Ubuntu via PPA":
sudo add-apt-repository ppa:webupd8team/java
sudo apt-get update
sudo apt-get install oracle-java7-installer
apt-get install oracle-java7-set-default
apt-get install oracle-jdk7-installer
60. Install other packages:
- apache2
- libapache2-mod-perl2
- kompozer
- gimp
- filezilla
- dropbox
- pidgin
- chromium
- git
- java6 (for use with tomcat6)
- tomcat6
- tomcat6-admin
- tomcat6-docs
- For tomcat to work, also set JAVA_HOME in /etc/default/tomcat6 . ls /usr/lib/jvm to see available java versions.
- See also instructions below for increasing jvm heap size.
- google-talkplugin (for google hangout)
- skype
- ia32-libs (for 32-bit support needed by some apps, such as webex?)
- Thunderbird add-on google-search-for-thunderbird
- perldoc -- install via "apt-get install perldoc", because it isn't in the Ubuntu Software Manager
- skype
- libexpat1-dev (needed by XML::Parser, needed by clmailer.pl)
- Perl modules (via cpan):
- XML::Parser (needed by clmailer.pl)
- XML::Simple
- perldoc
- html2text
- subversion
- exiv2 (for converting photos)
- rapper (raptor2-utils) for RDF translation
- zlib1g-dev (for perl XML processing & RDF -- install this before the others below)
- libxml2-dev (for perl XML processing & RDF)
- libxml-perl (for perl XML processing & RDF)
- CANCEL: librdf-perl (Redland RDF library) -- not sure if I need it.
- librdf-trine-perl (for perl RDF)
- gthumb (for image thumbnails)
- InSync (for Google Drive synchronization) I have the beta, which is still free. The latest costs.
70. Install encrypted private directory. This creates an
encrypted subdirectory called Private in your home directory. The
encrypted version is stored in ~/.Private .
sudo apt-get install ecryptfs-utils
ecryptfs-setup-private
71. Set up address list encryption/decryption. See instructions in rgad.perl .
72. Disable overly scrollbars.
echo export LIBOVERLAY_SCROLLBAR=0 >> ~/.xprofile
73. When accidentally logged in using "Gnome Classic" instead of "Gnome
Classic (no effects)", ALT-TAB no longer works for changing
windows. I tried to fix it by installing CompizConfig Settings
Manager and enabling "Application Switcher", but that caused the system
to hang when using ALT-TAB. However, enabling "Static Application
Switcher" seemed to work. But I intended to be using "Gnome
Classic (no effects)" anyway. I wish I could disable the "Gnome
Classic" option to avoid accidentally using it in the future.
74. Video player. Tried to install ubuntu-restricted-extras, but
it says I must first remove Libav codec library (libavcodec53) and
Libav utility library (libavutil51). So I uninstalled those, then
installed ubuntu-restricted-extras. @@ to be continued @@
On my previous Dell Studio 15 laptop under Ubuntu 10.04 I got DVD video
playing to work using these instructions:
http://ubuntuforums.org/showthread.php?t=1621158
75. Install vmware. (See also old virtualbox notes in personal/notes/virtualbox-install.txt .) Download VMware Player for Linux 64-bit. Install Windows 7 Ultimate initially,
'/downloads/ms-windows-7/X17-59463 (1).iso', do not use the license
key, then install the Windows 7 upgrade,
'/downloads/ms-windows-7/Win7UltimateUpgrade32bit.iso', and then use
the license key.
I had trouble getting it to boot from the new ISO. It always
wanted to boot from hard drive (HD). I finally got it to boot
from ISO using these instructions: http://code-journey.com/2009/vmware-boots-too-fast-to-enter-bios-or-choose-boot-source-biosbootdelay/
by adding the following line to /vmware/Windows7/Windows7.vmx :
bios.bootDelay = "5000"
I had to replace the smart quotes with regular quotes around "5000". That
allowed me to get to the BIOS using F2 when it was starting to boot.
Then I changed the boot order for the CD -- moved it above the HD --
but then I still had to "hit any key" in time when booting or else it
would still boot from HD. Select "Custom Install" during
installation.
@@ to be continued @@
80. Sesame. Sesame stores its data in /usr/share/tomcat6/.aduna ,
so to secure the data we need to make sesame store its files in my
encrypted ~/Private directory , using a symbolic link:
sudo bash
# cd ~/Private
# mkdir tomcat6
# mkdir tomcat6/aduna
# chown -R tomcat6.tomcat6 tomcat6/
# ls -l
total 4
drwxr-xr-x 3 tomcat6 tomcat6 4096 Mar 12 11:32 tomcat6
# chmod -R o-rwx tomcat6/
# ls -l
total 4
drwxr-x--- 3 tomcat6 tomcat6 4096 Mar 12 11:32 tomcat6
# ln -s /home/dbooth/Private/tomcat6/aduna/ /usr/share/tomcat6/.aduna
Set rx permissions to allow tomcat6 to follow the symlink into my Private directory:
# chmod go+rx ~/Private/
root@dbooth-w530:/var/log/tomcat6# ll -d ~/Private/
drwxr-xr-x 4 dbooth dbooth 4096 Mar 12 12:08 /home/dbooth/Private/
Add user and role in /etc/tomcat6/tomcat-users.xml . Uncomment the last
several lines, and change them to the following (putting in a more
secure password though):
  <role rolename="manager-gui"/>
  <role rolename="admin"/>
  <user username="tomcat" password="tomcat" roles="admin,manager-gui"/>
Limit
tomcat to listen only to requests from localhost. In
/etc/tomcat6/server.xml , modify the appropriate <Connector ...>
line:
   <!-- dbooth 4/7/14: added address="127.0.0.1" to limit tomcat access
         to requests from localhost, per instructions at
        http://java-monitor.com/forum/showthread.php?t=32
        http://tomcat.apache.org/tomcat-6.0-doc/config/http.html
    -->
    <Connector address="127.0.0.1" port="8080" protocol="HTTP/1.1"
Increase tomcat6 memory using -Xmx option. According to this post, the proper place to specify java heap size for tomcat6 is in /etc/default/tomcat6:
##### dbooth 8/22/13: Increased heap space:
# JAVA_OPTS="-Djava.awt.headless=true -Xmx128m -XX:+UseConcMarkSweepGC"
JAVA_OPTS="-Djava.awt.headless=true -Xmx2g -XX:+UseConcMarkSweepGC"
Restart tomcat6:
# service tomcat6 restart
Download Sesame 2.6.10. Follow links for latest download from here to here to here.
For an unknown reason, tar gives an error: "tar: A lone zero block at
32914" when unpacking, even though it seems to work.
tar xzvf openrdf-sesame-2.6.10-sdk.tar.gz
Deploy the sesame and openrdf war files. In the tomcat manager
scroll down to "Select WAR file to upload", and from
/downloads/sesame-2_6_10/openrdf-sesame-2.6.10/war select and deploy
both openrdf-sesame.war openrdf-workbench.war (one at a time).
The local OpenRDF UI can now be accessed. Set the server to http://localhost:8080/openrdf-sesame .
82. To get the latest Sesame code (though I currently do not use it in the RDF Pipeline Framework), go to the sesame page on bitbucket,
copy the https: URI on the right,
https://bitbucket.org/openrdf/sesame.git , and paste it into a git
command to clone the repository into the current directory (so cd
first):
mkdir /downloads/sesame
cd /downloads/sesame
git clone https://bitbucket.org/openrdf/sesame.git
cd sesame/core
ant package
. . .
BUILD SUCCESSFUL
Total time: 47 minutes 56 seconds
85. Configure RDF Pipeline server.
See rdf-pipeline/trunk/apache2-config/ReadMe.txt
Transfer installed packages
The goal of this section is the transfer a list of packages from one
Ubuntu system to another. See
Move
your Ubuntu system to another computer in 3 simple steps.
30. On the old system, generate the list of installed packages:
-------------
Transfer files from a previous Ubuntu system.
http://eggsonbread.com/2010/01/28/move-ubuntu-to-another-computer-in-3-simple-steps/
---------------
2. Graphics card
http://sagark.org/optimal-ubuntu-graphics-setup-for-thinkpads/